


User Guide
How to Use Illustration Toolkits
We provide you with thousands of professionally designed biological and medical illustrations to help you save time and effort to illustrate quality presentations and publications. All illustrations are already inserted into PowerPoint for your convenience. Individual drawing elements are vector graphics and can be scaled to any size without loss of resolution. You are able to freely change line/filling colors and extract/combine them to create your own illustrations. To learn more, View & Download Sample Illustrations
1. How to insert drawings
2. How to group/ungroup drawings
3. How to combine/extract drawings
4. How to scale/resize drawings
5. How to change colors and lines
6. How to save PPT slides as high resolution (300 DPI) images for publications
(The following screenshots are based on PowerPoint 2010 in Windows 7)
1. How to insert drawings

2. How to group/ungroup diagrams
3. How to combine/extract drawings

4. How to scale/resize drawings
Our diagrams are vector graphics. You are able to enlarge them to any size without loss of the display resolution.

5. How to change colors and lines
You are able to freely change filling colors and lines to fit your slide theme.
6. How to save PPT slides as high resolution (300 DPI) images for publications
You may have known already that most of publishers do not accept PowerPoint slides as figures. By default, when you save a PowerPoint slide as an image file, the resolution is 96 DPI. However publishers require 300 DPI or higher for figures. It will be very time consuming to recreate figures by using other graphic software, e.g., Adobe PhotoShop.
This following paper shows you step-by-step how to save PowerPoint slides as 300 DPI high resolution images (.jpg, .tiff, et al) directly from PowerPoint.
How to Save PowerPoint Slides as 300 DPI High Resolution Image Files for Publications
Download Free Sample, Learn How Our Illustration Toolkits Save Your Time and Effort to Illustrate Quality Presentations and Publications

We provide you with thousands of professionally designed biological and medical illustrations to help you save time and effort to illustrate quality presentations and publications. All illustrations are already inserted into PowerPoint for your convenience. Individual drawing elements are vector graphics and can be scaled to any size without loss of resolution. You are able to freely change line/filling colors and extract/combine them to create your own illustrations. To learn more, View & Download Sample Illustrations
1. How to insert drawings
2. How to group/ungroup drawings
3. How to combine/extract drawings
4. How to scale/resize drawings
5. How to change colors and lines
6. How to save PPT slides as high resolution (300 DPI) images for publications
(The following screenshots are based on PowerPoint 2010 in Windows 7)
1. How to insert drawings
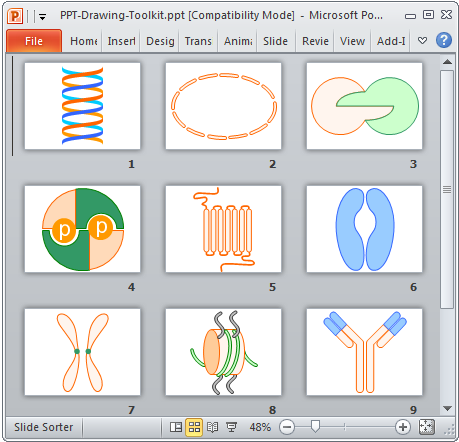
- All illustrations are already placed in PowerPoint. To open an Illustration Toolkit, just double-clicking the .PPT file, or directly with Microsoft PowerPoint, by selecting File > Open
-
Double click on the slide containing drawings you want to use, then select the drawing to highlight it.
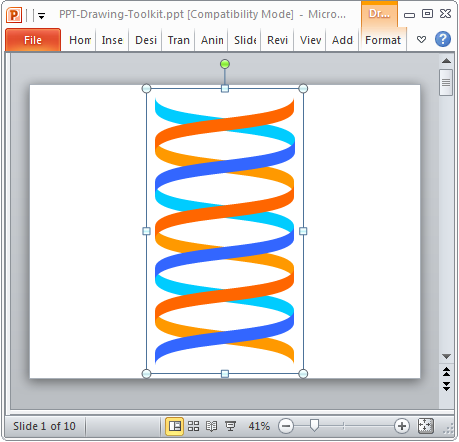
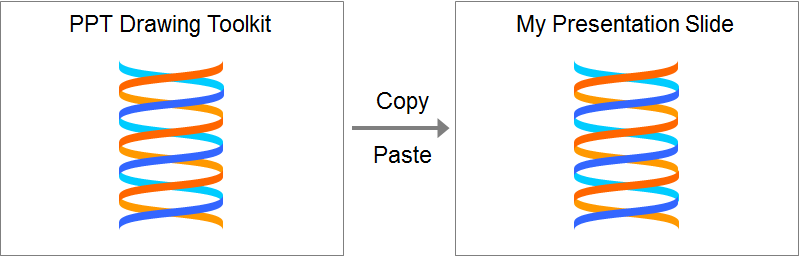
-
Copy the drawing and paste it into your presentation slides
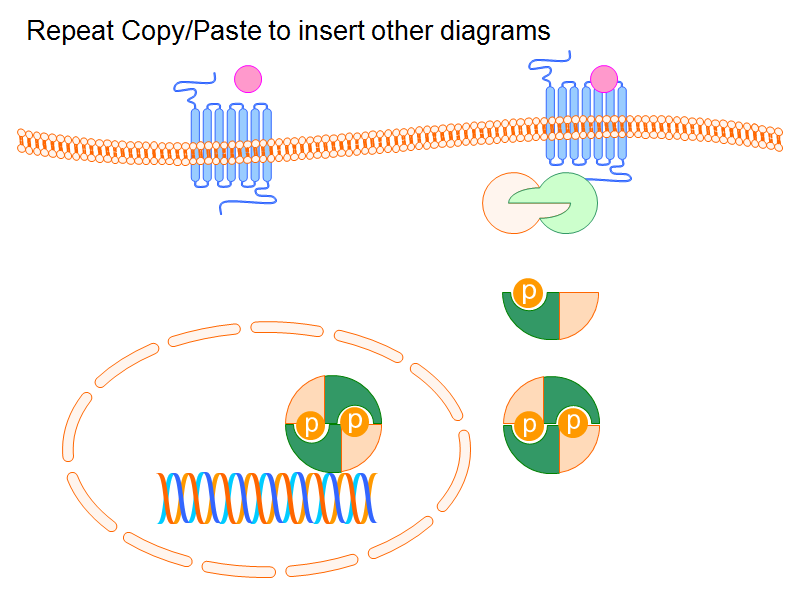
-
Repeat those steps to insert other drawings.
-
Add annotations, connections, and a title. Your slide is complete and ready for presentation.
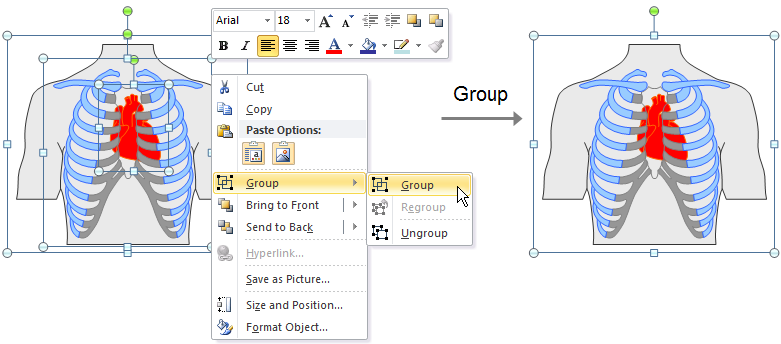
2. How to group/ungroup diagrams
-
Group - You are able to group drawings to let you rotate, flip, move, or resize all shapes at the same time as though they were a single one.
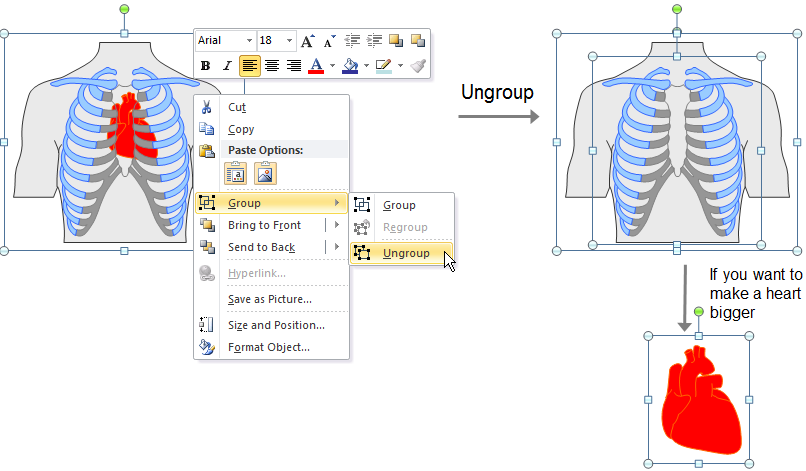
- Ungroup - If you want to make any changes to one drawing without changing the other ones.
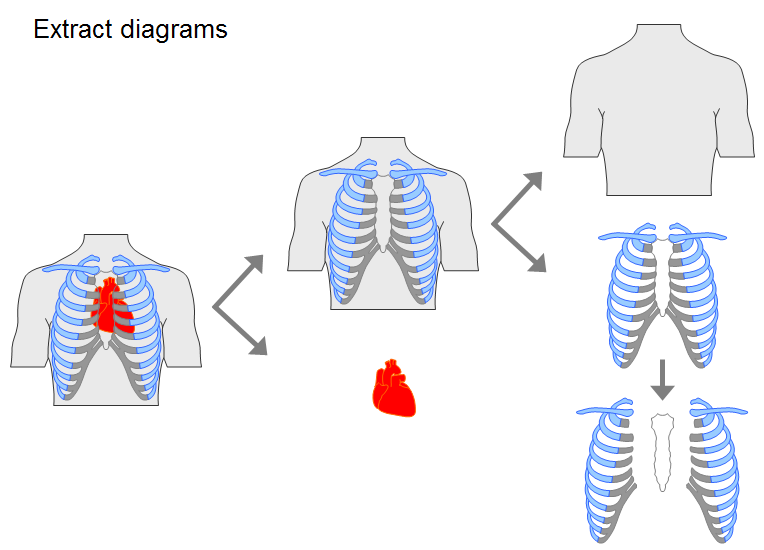
3. How to combine/extract drawings
- Combine - You can combine drawings to create your own illustrations.
- Extract - One drawing consists of one or more components. You are able to disassemble a drawing to extract components what you need.
4. How to scale/resize drawings
Our diagrams are vector graphics. You are able to enlarge them to any size without loss of the display resolution.
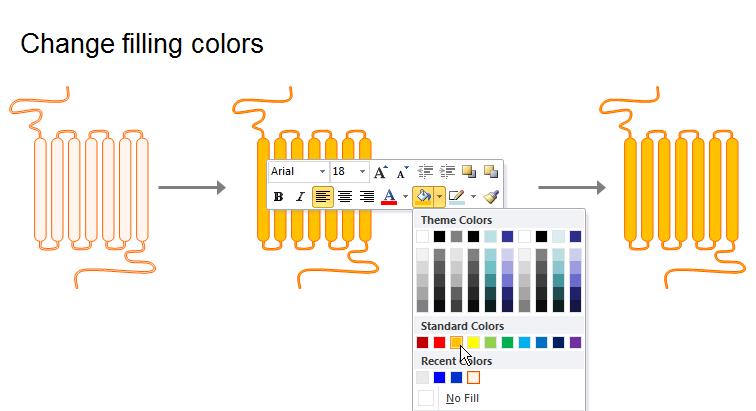
5. How to change colors and lines
You are able to freely change filling colors and lines to fit your slide theme.
- Change filling colors
-
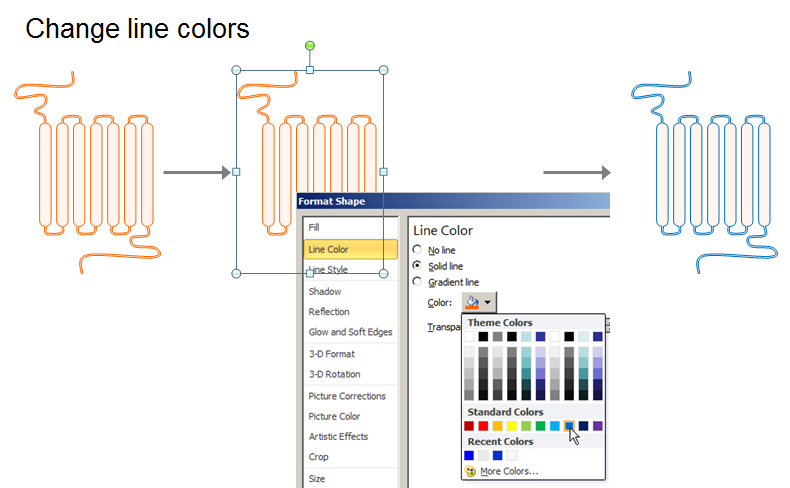
Change line colors.
-
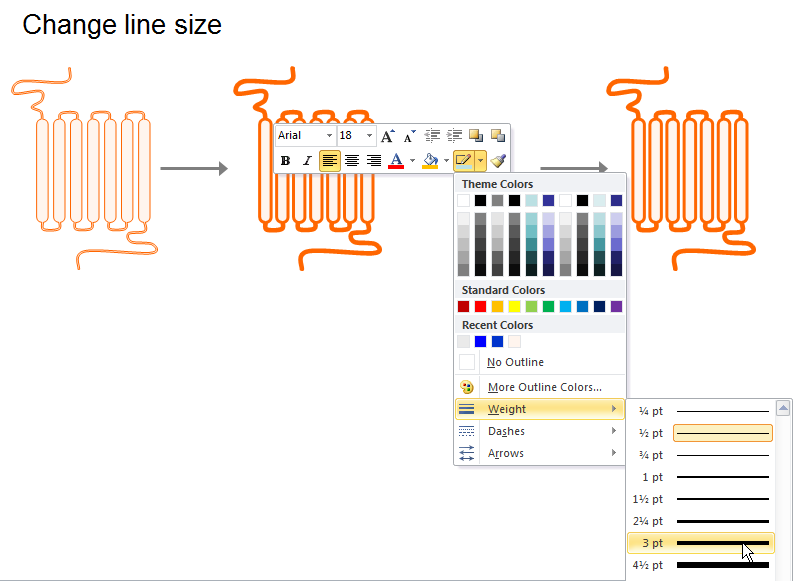
Change line size.
6. How to save PPT slides as high resolution (300 DPI) images for publications
You may have known already that most of publishers do not accept PowerPoint slides as figures. By default, when you save a PowerPoint slide as an image file, the resolution is 96 DPI. However publishers require 300 DPI or higher for figures. It will be very time consuming to recreate figures by using other graphic software, e.g., Adobe PhotoShop.
This following paper shows you step-by-step how to save PowerPoint slides as 300 DPI high resolution images (.jpg, .tiff, et al) directly from PowerPoint.
How to Save PowerPoint Slides as 300 DPI High Resolution Image Files for Publications
Download Free Sample, Learn How Our Illustration Toolkits Save Your Time and Effort to Illustrate Quality Presentations and Publications

|